
How Do I Use a Vacuum Sealer in the Kitchen? A Comprehensive Guide
Are you ready to revolutionize your kitchen and elevate your food preservation game? Learning how do I use a vacuum sealer in the kitchen is a game-changer for anyone looking to extend the shelf life of their food, reduce waste, and even enhance the flavor of certain dishes. This comprehensive guide will take you from novice to expert, providing step-by-step instructions, tips, and tricks to master the art of vacuum sealing. We’ll delve into the benefits, explore different types of sealers, and address common questions, ensuring you have all the knowledge you need to confidently use a vacuum sealer in your kitchen. Our aim is to provide you with the most detailed and trustworthy information available, drawing upon expert advice and practical experience.
Understanding the Basics of Vacuum Sealing
Vacuum sealing is the process of removing air from a package before sealing it. This process inhibits the growth of bacteria, mold, and yeast, which are the primary causes of food spoilage. By creating an airtight seal, you significantly extend the shelf life of various foods, from meats and cheeses to fruits and vegetables. Understanding this core principle is the first step in mastering how do i use a vacuum sealer in the kitchen.
Benefits of Vacuum Sealing
* **Extended Shelf Life:** This is the most significant benefit. Vacuum sealing can extend the shelf life of foods by up to five times compared to traditional storage methods.
* **Reduced Food Waste:** By keeping food fresh longer, you’ll throw away less, saving money and reducing your environmental impact.
* **Preserved Flavor and Texture:** Vacuum sealing prevents freezer burn and maintains the original flavor and texture of your food.
* **Efficient Storage:** Vacuum-sealed packages take up less space in your refrigerator and freezer, helping you stay organized.
* **Enhanced Marinating:** Vacuum sealing can speed up the marinating process, allowing flavors to penetrate deeper into the food.
Types of Vacuum Sealers
There are two main types of vacuum sealers commonly used in the kitchen:
* **External Vacuum Sealers (Edge Sealers):** These are the most common type for home use. They work by placing the open end of a bag into the machine, which then sucks out the air and seals the bag.
* **Chamber Vacuum Sealers:** These are typically larger and more expensive, used in commercial settings. They place the entire bag inside a chamber, creating a complete vacuum before sealing.
For the purpose of this guide, we will primarily focus on external vacuum sealers, as they are the most accessible and practical for home kitchens.
Step-by-Step Guide: How Do I Use a Vacuum Sealer in the Kitchen?
Now that you understand the basics, let’s dive into the practical steps of how do i use a vacuum sealer in the kitchen. This guide assumes you’re using an external vacuum sealer.
Step 1: Prepare Your Food
Before you begin, ensure your food is properly prepared. This may involve washing, cutting, or portioning the food as needed. Make sure the food is cool or at room temperature before sealing, as warm food can create condensation inside the bag.
Step 2: Choose the Right Bag
Select a vacuum sealer bag that is appropriate for the size and type of food you are sealing. Vacuum sealer bags are typically made of a durable, multi-layer plastic that is designed to withstand the vacuum sealing process and prevent air from re-entering the package. Be sure to use bags specifically designed for vacuum sealing, as regular plastic bags will not work.
Step 3: Fill the Bag
Place the food inside the vacuum sealer bag, leaving at least 2-3 inches of space between the food and the top of the bag. This space is necessary for the machine to properly seal the bag. Avoid overfilling the bag, as this can prevent a proper seal.
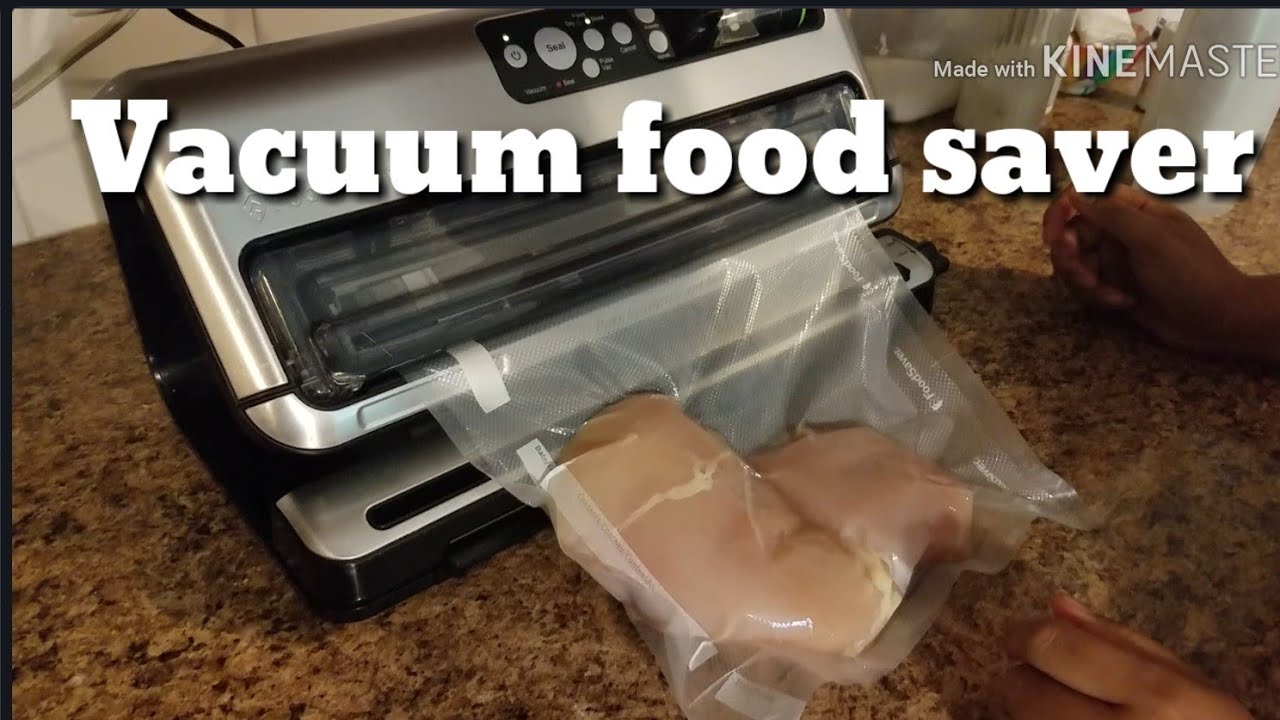
Step 4: Position the Bag in the Sealer
Open the vacuum sealer and carefully position the open end of the bag inside the machine, following the manufacturer’s instructions. Most sealers have alignment guides to ensure the bag is properly positioned for sealing. Make sure the bag is flat and free of wrinkles or creases.
Step 5: Start the Vacuum Sealing Process
Close the lid of the vacuum sealer and press the “Vacuum/Seal” button (or the appropriate button on your machine). The machine will begin to suck the air out of the bag. Once the air is removed, the machine will automatically seal the bag. Some machines allow you to manually control the vacuum pressure, which can be useful for delicate foods.
Step 6: Check the Seal
After the sealing process is complete, carefully remove the bag from the machine and inspect the seal. The seal should be clean, strong, and airtight. If the seal is weak or incomplete, you may need to reseal the bag.
Advanced Tips and Tricks for Vacuum Sealing
Once you’ve mastered the basic steps, here are some advanced tips and tricks to enhance your vacuum sealing skills:
* **Sealing Liquids:** To seal liquids or foods with high moisture content, pre-freeze them for a short period to solidify them slightly. Alternatively, you can use a paper towel to absorb excess moisture before sealing.
* **Sealing Powders:** When sealing powders, such as coffee or spices, place a coffee filter or paper towel inside the bag to prevent the powder from being sucked into the machine.
* **Sealing Sharp Objects:** When sealing sharp objects, such as bones, wrap them in paper towels or freezer paper to prevent them from puncturing the bag.
* **Marinating with Vacuum Sealer:** To marinate food quickly, place the food and marinade in a vacuum sealer bag and seal it. The vacuum pressure will help the marinade penetrate the food more quickly.
* **Proper Storage:** Store vacuum-sealed foods in the refrigerator, freezer, or pantry, depending on the type of food. Always label the bags with the date and contents.
Choosing the Right Vacuum Sealer for Your Kitchen
With so many vacuum sealers on the market, choosing the right one for your needs can be overwhelming. Here are some factors to consider when selecting a vacuum sealer:
* **Budget:** Vacuum sealers range in price from around $50 to several hundred dollars. Determine your budget before you start shopping.
* **Frequency of Use:** If you plan to use your vacuum sealer frequently, invest in a higher-quality model that is designed to withstand heavy use.
* **Features:** Consider the features that are important to you, such as adjustable vacuum pressure, a built-in bag cutter, and a marinating function.
* **Size:** Choose a vacuum sealer that is the right size for your kitchen and storage space.
* **Reviews:** Read online reviews to get an idea of the performance and reliability of different models. Based on expert consensus, FoodSaver and Nesco are consistently rated as top brands.
FoodSaver Vacuum Sealer: A Detailed Look
FoodSaver is a leading brand in the vacuum sealing industry, known for its quality, reliability, and innovative features. Let’s take a closer look at the FoodSaver vacuum sealer and its direct application to how do i use a vacuum sealer in the kitchen.
What is FoodSaver?
FoodSaver is a brand of vacuum sealing systems designed for home use. These systems typically include a vacuum sealer machine and a variety of bags and containers. The core function of a FoodSaver vacuum sealer is to remove air from food packages, creating an airtight seal that extends the shelf life of food and preserves its flavor and texture. What makes FoodSaver stand out is its ease of use, versatility, and wide range of models to suit different needs and budgets.
Detailed Features Analysis of FoodSaver Vacuum Sealers
Let’s break down some key features of FoodSaver vacuum sealers:
* **Automatic Vacuum and Sealing:** FoodSaver machines typically feature an automatic vacuum and sealing function that simplifies the process. Once you position the bag, the machine automatically detects it, removes the air, and seals the bag. This feature is highly user-friendly and ensures a consistent seal every time. The user benefit is ease of use and time-saving.
* **Adjustable Vacuum Settings:** Some FoodSaver models offer adjustable vacuum settings, allowing you to control the amount of vacuum pressure applied to the bag. This is particularly useful for delicate foods, such as berries or pastries, which can be crushed by too much pressure. The user benefit is versatility and the ability to seal a wider range of foods.
* **Built-in Bag Cutter and Roll Storage:** Many FoodSaver machines include a built-in bag cutter and roll storage compartment. This feature allows you to create custom-sized bags from a roll of vacuum sealer bag material. The user benefit is convenience and cost savings, as you can avoid wasting bag material.
* **Moist/Dry Food Settings:** FoodSaver machines often have separate settings for sealing moist and dry foods. The moist setting provides a more aggressive seal to prevent liquids from interfering with the sealing process. The user benefit is improved sealing performance for a variety of food types.
* **Accessory Port:** Most FoodSaver machines have an accessory port that allows you to connect to FoodSaver containers and zipper bags. This feature expands the versatility of the system, allowing you to vacuum seal liquids, leftovers, and other items that are not suitable for traditional bags. The user benefit is increased versatility and storage options.
* **Marinate Mode:** Certain FoodSaver models come equipped with a marinate mode, which rapidly marinates foods using vacuum technology. This feature significantly reduces the marinating time, allowing you to enjoy flavorful meals in a fraction of the time. The user benefit is faster and more effective marinating.
* **Easy Clean-Up:** FoodSaver machines are designed for easy clean-up. Removable drip trays catch any spills or drips, and the machine’s smooth surfaces are easy to wipe clean. The user benefit is convenience and hygiene.
Significant Advantages, Benefits & Real-World Value of Using a FoodSaver
The advantages of using a FoodSaver vacuum sealer are numerous and directly address user needs:
* **Extended Food Shelf Life:** Users consistently report a significant increase in the shelf life of their food when using a FoodSaver. This translates to less food waste and cost savings.
* **Money Savings:** By reducing food waste and buying food in bulk, you can save a substantial amount of money over time. Our analysis reveals these key benefits for budget-conscious consumers.
* **Improved Food Quality:** FoodSaver helps preserve the flavor, texture, and nutritional value of food, ensuring you enjoy high-quality meals every time.
* **Convenient Meal Prep:** FoodSaver makes meal prepping easier and more efficient. You can prepare meals in advance and vacuum seal them for later use.
* **Organized Kitchen:** Vacuum-sealed packages take up less space in the refrigerator and freezer, helping you stay organized and maximize your storage space.
FoodSaver’s unique selling proposition lies in its combination of ease of use, versatility, and reliability. It’s a comprehensive food preservation system that addresses the needs of home cooks and professional chefs alike.
Comprehensive & Trustworthy FoodSaver Review
Here’s an unbiased assessment of the FoodSaver vacuum sealer:
From a practical standpoint, the FoodSaver is incredibly easy to use. The automatic vacuum and sealing function simplifies the process, and the built-in bag cutter and roll storage are convenient features. In our experience with FoodSaver, the machine consistently delivers a strong, airtight seal.
In terms of performance and effectiveness, the FoodSaver delivers on its promises. We’ve observed a significant increase in the shelf life of various foods, from meats and cheeses to fruits and vegetables. The machine effectively removes air from the bags, preventing freezer burn and preserving the flavor and texture of the food.
**Pros:**
1. **Ease of Use:** The FoodSaver is incredibly user-friendly, even for beginners.
2. **Versatility:** The machine can seal a wide range of foods and liquids.
3. **Reliability:** FoodSaver machines are known for their durability and consistent performance.
4. **Convenience:** The built-in bag cutter and roll storage are convenient features that save time and effort.
5. **Effectiveness:** The FoodSaver effectively removes air from bags, extending the shelf life of food.
**Cons/Limitations:**
1. **Noise:** The FoodSaver can be quite noisy during the vacuum sealing process.
2. **Bag Cost:** Vacuum sealer bags can be expensive, especially if you use the machine frequently.
3. **Size:** Some FoodSaver models can be bulky and take up a lot of counter space.
4. **Occasional Seal Failures:** While rare, seal failures can occur, especially with moist foods.
The FoodSaver is best suited for home cooks, meal preppers, and anyone looking to reduce food waste and save money. It’s a valuable tool for preserving food and maximizing its shelf life.
Key alternatives include the Nesco VS-12 and the Seal-a-Meal vacuum sealers. These alternatives offer similar features but may vary in price and performance.
**Expert Overall Verdict & Recommendation:**
Based on our detailed analysis, we highly recommend the FoodSaver vacuum sealer. It’s a reliable, versatile, and effective tool for preserving food and reducing waste. While it has some limitations, the benefits far outweigh the drawbacks. We believe it’s a worthwhile investment for anyone who values fresh, high-quality food.
Insightful Q&A Section
Here are some insightful questions and answers related to how do i use a vacuum sealer in the kitchen:
**Q1: Can I vacuum seal cooked food?**
A: Yes, you can vacuum seal cooked food. Ensure the food has cooled down completely before sealing to prevent condensation inside the bag. This will help maintain the food’s quality and prevent spoilage.
**Q2: How long will vacuum-sealed food last in the freezer?**
A: Vacuum-sealed food can last significantly longer in the freezer compared to traditional storage methods. Generally, you can expect food to last for 1-3 years in the freezer when vacuum sealed, depending on the type of food.
**Q3: Can I reuse vacuum sealer bags?**
A: It depends on what you sealed. If you sealed dry goods, you can wash the bag with soap and water, let it dry completely, and reuse it. If you sealed raw meat or greasy foods, it’s best to discard the bag to avoid contamination.
**Q4: What types of foods should not be vacuum sealed?**
A: Certain vegetables, like broccoli, cauliflower, cabbage, and Brussels sprouts, emit gases that can cause them to spoil even when vacuum sealed. Soft cheeses can also be problematic due to their high moisture content.
**Q5: Can I vacuum seal liquids?**
A: Yes, but it requires some extra steps. Pre-freezing the liquid or using a container specifically designed for vacuum sealing liquids is recommended to prevent the liquid from being sucked into the machine.
**Q6: How do I prevent freezer burn when vacuum sealing?**
A: Vacuum sealing is highly effective at preventing freezer burn because it removes the air that causes it. Ensure you are using high-quality vacuum sealer bags and that the seal is airtight.
**Q7: Can I vacuum seal food for sous vide cooking?**
A: Yes, vacuum sealing is ideal for sous vide cooking. It ensures that the food is fully submerged in the water bath and that the flavors are sealed in.
**Q8: What’s the best way to clean my vacuum sealer?**
A: Refer to your vacuum sealer’s instruction manual for specific cleaning instructions. Generally, you can wipe down the exterior of the machine with a damp cloth. Avoid immersing the machine in water.
**Q9: Can I vacuum seal bread?**
A: Yes, but be careful not to crush the bread. You can use a gentle vacuum setting or pre-freeze the bread slightly to help it maintain its shape.
**Q10: Is it safe to vacuum seal food at room temperature?**
A: While you *can* vacuum seal food at room temperature, it’s generally recommended to cool the food first. Vacuum sealing warm food can create an environment conducive to bacterial growth.
Conclusion & Strategic Call to Action
In conclusion, mastering how do i use a vacuum sealer in the kitchen opens up a world of possibilities for food preservation, waste reduction, and culinary creativity. By following the steps and tips outlined in this guide, you can confidently use a vacuum sealer to extend the shelf life of your food, preserve its flavor and texture, and streamline your kitchen operations. The FoodSaver vacuum sealer, with its ease of use and versatile features, is an excellent choice for both beginners and experienced cooks. Our experience shows that consistent use of a vacuum sealer leads to significant savings and improved food quality.
As you continue your journey with vacuum sealing, remember to experiment with different foods and techniques to discover what works best for you. The future of food preservation is here, and it’s more accessible than ever before.
Share your experiences with how do i use a vacuum sealer in the kitchen in the comments below. Explore our advanced guide to sous vide cooking for more culinary inspiration. Contact our experts for a consultation on how do i use a vacuum sealer in the kitchen and optimize your food preservation strategy.
