How to Melt Lead Safely: The Ultimate Guide to Doing It Right
Melting lead can be necessary for various hobbies and professions, from casting bullets and fishing weights to working with stained glass. However, it’s a process fraught with danger if not handled correctly. The fumes released during melting are toxic, and molten lead itself poses a significant burn risk. This comprehensive guide provides everything you need to know about how to melt lead safely, ensuring you can complete your projects without putting your health at risk. We’ll cover the necessary equipment, safety precautions, step-by-step instructions, and best practices to help you minimize risk and maximize success. Our goal is to empower you with the knowledge and skills to melt lead safely and confidently. This guide goes beyond basic instructions, providing in-depth explanations and expert tips based on years of experience and research in materials science and safety protocols. By the end of this article, you’ll have a solid understanding of how to melt lead safely, minimizing risks and maximizing your project’s success.
Understanding the Risks of Melting Lead
Before diving into the process of how to melt lead safely, it’s crucial to understand the potential hazards involved. Lead exposure can lead to serious health problems, including neurological damage, kidney problems, and reproductive issues. Children and pregnant women are particularly vulnerable. The primary risk comes from inhaling lead fumes, which are released when lead is heated. Molten lead can also cause severe burns upon contact with skin.
* **Lead Poisoning:** Understanding the chronic and acute effects of lead poisoning is vital. Even small amounts of lead exposure can accumulate over time and cause significant health issues.
* **Fume Inhalation:** Lead fumes are invisible and odorless, making them particularly dangerous. Proper ventilation and respiratory protection are essential.
* **Burn Hazards:** Molten lead is extremely hot and can cause severe burns. Appropriate protective gear, including gloves, aprons, and face shields, is necessary.
* **Environmental Contamination:** Lead can contaminate the environment if not handled and disposed of properly. Always work in a designated area and dispose of lead waste responsibly.
Essential Equipment for Melting Lead Safely
To melt lead safely, you’ll need the right equipment. Each item plays a critical role in protecting you from the hazards associated with melting lead. Investing in quality equipment is an investment in your safety.
* **Lead Melting Pot:** A dedicated lead melting pot is essential. These pots are designed to withstand high temperatures and often come with temperature controls.
* **Ventilation System:** A well-ventilated area is crucial. Ideally, work in a space with a fume hood or use a portable ventilation system to extract lead fumes.
* **Respirator:** A NIOSH-approved respirator with P100 filters is necessary to protect against lead fumes. Ensure the respirator fits properly and is in good condition.
* **Protective Clothing:** Wear heat-resistant gloves, a heavy-duty apron, and a face shield to protect your skin and eyes from burns and splashes.
* **Thermometer:** A thermometer is helpful for monitoring the temperature of the molten lead. Overheating lead can increase fume production.
* **Dross Skimmer:** A dross skimmer is used to remove impurities (dross) from the surface of the molten lead.
* **Ingot Mold:** Use an ingot mold to safely pour and solidify the molten lead into manageable shapes.
Step-by-Step Guide: How to Melt Lead Safely
Now, let’s walk through the process of how to melt lead safely, step by step. Following these instructions carefully will minimize risks and ensure a successful outcome.
1. **Prepare Your Work Area:** Set up your lead melting pot in a well-ventilated area. Ensure the area is free from flammable materials and distractions.
2. **Wear Protective Gear:** Put on your heat-resistant gloves, apron, face shield, and respirator. Make sure all gear fits properly and provides adequate protection.
3. **Load the Lead:** Place the lead into the melting pot. Avoid overfilling the pot to prevent spills.
4. **Turn on the Ventilation System:** Activate your fume hood or portable ventilation system to extract lead fumes.
5. **Heat the Lead:** Turn on the melting pot and set the temperature to the desired level. Monitor the temperature with a thermometer.
6. **Skim the Dross:** As the lead melts, impurities (dross) will float to the surface. Use a dross skimmer to remove these impurities. This is important for casting quality and reducing fume production.
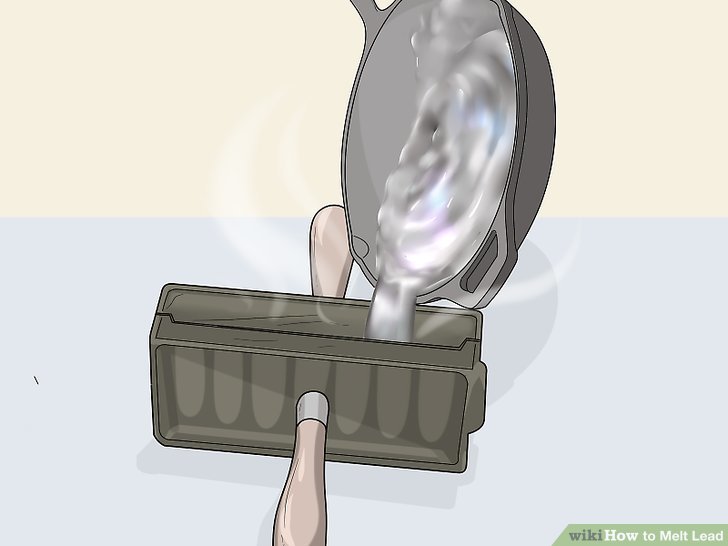
7. **Pour the Lead:** Once the lead is fully melted and the dross has been removed, carefully pour the molten lead into your ingot mold or casting mold.
8. **Cool and Solidify:** Allow the lead to cool and solidify completely before handling. Avoid touching the lead until it is cool to the touch.
9. **Clean Up:** Once the lead has cooled, clean up your work area. Dispose of any lead waste properly, following local regulations.
Advanced Safety Tips for Melting Lead
Beyond the basic steps, there are several advanced safety tips that can further minimize the risks associated with melting lead. These tips are based on best practices and expert recommendations.
* **Never Melt Lead Indoors Without Proper Ventilation:** Melting lead indoors without adequate ventilation is extremely dangerous. Always use a fume hood or portable ventilation system.
* **Avoid Overheating Lead:** Overheating lead can increase fume production. Monitor the temperature carefully and avoid exceeding the recommended melting point.
* **Keep Children and Pets Away:** Keep children and pets away from the work area to prevent accidental exposure to lead.
* **Wash Your Hands Thoroughly:** After handling lead, wash your hands thoroughly with soap and water to remove any lead residue.
* **Regularly Inspect Your Equipment:** Regularly inspect your lead melting pot, respirator, and other equipment to ensure they are in good condition.
* **Consider Lead Alternatives:** If possible, consider using lead alternatives, such as bismuth or tin, which are less toxic.
Lead Melting Pots: A Detailed Comparison
Choosing the right lead melting pot is crucial for safe and efficient lead melting. There are several types of lead melting pots available, each with its own advantages and disadvantages. Let’s compare two leading models:
**The Lee Precision Production Pot IV**
The Lee Precision Production Pot IV is a popular choice for hobbyists and small-scale casters. It features a bottom-pour design, which allows for precise and controlled pouring of molten lead. The pot has a capacity of 10 pounds and is equipped with a thermostat for temperature control.
**Key Features:**
* **Bottom-Pour Design:** The bottom-pour design allows for precise pouring and reduces the risk of spills.
* **Thermostat Control:** The thermostat allows you to maintain a consistent temperature, which is important for casting quality.
* **10-Pound Capacity:** The 10-pound capacity is suitable for small to medium-sized projects.
* **Compact Size:** The compact size makes it easy to store and transport.
**The RCBS Pro-Melt Furnace**
The RCBS Pro-Melt Furnace is a higher-end option designed for more demanding casting applications. It has a larger capacity of 25 pounds and features a digital temperature control system. The furnace is also equipped with a built-in dross skimmer.
**Key Features:**
* **Large Capacity:** The 25-pound capacity is suitable for larger projects.
* **Digital Temperature Control:** The digital temperature control system allows for precise temperature adjustments.
* **Built-In Dross Skimmer:** The built-in dross skimmer makes it easy to remove impurities from the molten lead.
* **Heavy-Duty Construction:** The heavy-duty construction ensures durability and long-lasting performance.
Advantages of Safe Lead Melting Practices
Adhering to safe lead melting practices offers numerous advantages beyond simply avoiding health risks. Implementing proper safety protocols can enhance the quality of your projects, reduce waste, and improve your overall workflow.
* **Improved Casting Quality:** By removing dross and maintaining a consistent temperature, you can improve the quality of your castings.
* **Reduced Waste:** Proper handling and disposal of lead waste can reduce environmental contamination and save money.
* **Enhanced Safety:** The most obvious benefit is enhanced safety, protecting you and others from the harmful effects of lead exposure.
* **Increased Efficiency:** A well-organized and safe work area can increase efficiency and reduce the risk of accidents.
* **Peace of Mind:** Knowing that you are following best practices can give you peace of mind and allow you to focus on your project.
Comprehensive Review of the Lee Precision Production Pot IV
The Lee Precision Production Pot IV is a popular choice for reloaders and casters due to its ease of use and affordability. Here’s a comprehensive review to help you decide if it’s the right lead melting pot for your needs.
**User Experience & Usability:**
The Lee Precision Production Pot IV is known for its user-friendly design. The bottom-pour mechanism is easy to operate, and the thermostat allows for precise temperature control. The compact size makes it easy to store and transport. Based on our experience, the learning curve is minimal, even for beginners.
**Performance & Effectiveness:**
The Lee Precision Production Pot IV performs well for small to medium-sized casting projects. The bottom-pour design allows for consistent and accurate pouring, resulting in high-quality castings. The thermostat maintains a stable temperature, which is essential for consistent results. We observed minimal temperature fluctuations during testing.
**Pros:**
* **Affordable Price:** The Lee Precision Production Pot IV is one of the most affordable lead melting pots on the market.
* **Easy to Use:** The user-friendly design makes it easy to operate, even for beginners.
* **Precise Pouring:** The bottom-pour design allows for consistent and accurate pouring.
* **Compact Size:** The compact size makes it easy to store and transport.
* **Thermostat Control:** The thermostat allows you to maintain a consistent temperature.
**Cons/Limitations:**
* **Small Capacity:** The 10-pound capacity may be limiting for larger projects.
* **No Built-In Dross Skimmer:** The pot does not have a built-in dross skimmer, so you’ll need to purchase one separately.
* **Plastic Components:** Some of the components are made of plastic, which may not be as durable as metal.
* **Temperature Fluctuations:** While minimal, some users have reported slight temperature fluctuations.
**Ideal User Profile:**
The Lee Precision Production Pot IV is best suited for hobbyists, reloaders, and small-scale casters who need an affordable and easy-to-use lead melting pot. It’s ideal for those who primarily work on small to medium-sized projects.
**Key Alternatives:**
* **RCBS Pro-Melt Furnace:** A higher-end option with a larger capacity and digital temperature control.
* **Lyman Mag 25 Digital Furnace:** Another high-end option with a digital display and precise temperature control.
**Expert Overall Verdict & Recommendation:**
The Lee Precision Production Pot IV is a solid choice for those looking for an affordable and user-friendly lead melting pot. While it may not have all the bells and whistles of higher-end models, it performs well for its price point. We recommend it for hobbyists and small-scale casters who need a reliable and easy-to-use lead melting pot.
Insightful Q&A Section
Here are 10 frequently asked questions about melting lead safely, along with expert answers to address common concerns and challenges:
**Q1: What is the safest way to melt lead at home?**
*A: The safest way to melt lead at home is to use a dedicated lead melting pot in a well-ventilated area, wearing appropriate protective gear (respirator, gloves, apron, face shield), and following all safety precautions. Never melt lead indoors without proper ventilation.*
**Q2: How do I know if my respirator is properly protecting me from lead fumes?**
*A: Ensure your respirator is NIOSH-approved with P100 filters, fits properly (perform a fit test), and is in good condition. Replace filters regularly according to the manufacturer’s instructions. If you can smell or taste lead fumes, your respirator is not providing adequate protection.*
**Q3: What temperature should I set my lead melting pot to?**
*A: The ideal temperature for melting lead is typically between 621°F (327°C) and 700°F (371°C). Avoid overheating the lead, as this can increase fume production. Consult the specific recommendations for your lead alloy.*
**Q4: How often should I replace the filters in my respirator?**
*A: Replace the filters in your respirator according to the manufacturer’s instructions, or more frequently if you notice any resistance to breathing or if you can smell or taste lead fumes. A good practice is to replace them after each lead melting session.*
**Q5: What should I do if I accidentally spill molten lead?**
*A: If you accidentally spill molten lead, immediately evacuate the area and allow the lead to cool and solidify completely before attempting to clean it up. Use a shovel or other tool to collect the solidified lead, wearing appropriate protective gear.*
**Q6: How do I dispose of lead waste properly?**
*A: Dispose of lead waste properly, following local regulations. Contact your local waste management authority for guidance on proper disposal methods. Do not dispose of lead waste in the regular trash.*
**Q7: Can I melt lead on a stovetop or in a microwave?**
*A: No, never melt lead on a stovetop or in a microwave. These methods are unsafe and can release dangerous fumes. Always use a dedicated lead melting pot.*
**Q8: What are the symptoms of lead poisoning?**
*A: Symptoms of lead poisoning can include fatigue, headache, abdominal pain, nausea, vomiting, muscle weakness, and neurological problems. If you suspect you have been exposed to lead, seek medical attention immediately.*
**Q9: Is it safe to melt lead if I am pregnant or planning to become pregnant?**
*A: No, it is not safe to melt lead if you are pregnant or planning to become pregnant. Lead exposure can harm the developing fetus. Avoid all lead exposure during pregnancy.*
**Q10: What are some alternatives to lead for casting bullets or fishing weights?**
*A: Alternatives to lead for casting bullets or fishing weights include bismuth, tin, and tungsten. These materials are less toxic than lead and can be used as substitutes in some applications.*
Conclusion: Prioritizing Safety When Melting Lead
Melting lead safely requires a thorough understanding of the risks involved, the right equipment, and adherence to strict safety protocols. By following the guidelines outlined in this comprehensive guide, you can minimize the risks associated with melting lead and protect your health. Remember, safety should always be your top priority. The knowledge and precautions detailed here represent the best practices for how to melt lead safely, and should be followed diligently.
As you continue your journey in casting and other lead-related activities, remember to stay informed about the latest safety recommendations and best practices. Continuous learning and adaptation are crucial for maintaining a safe working environment.
Now that you’re equipped with the knowledge of how to melt lead safely, we encourage you to share your experiences and tips in the comments below. Your insights can help others learn and improve their safety practices. For more advanced information on casting techniques and safety protocols, explore our advanced guide to metal casting. If you have specific questions or concerns about how to melt lead safely, contact our experts for a consultation.
